When I was in the first three years of university, I flew from Kota Kinabaluto Johor’s Senai Airport on AirAsia. From the airport, I usually take a private cab into Singapore for a princely sum.
Of course I had a choice of flying directly into Changi Airport but it was an expensive choice of SilkAir.
When AirAsia finally flew from KK to Singapore directly, I was ecstatic. I remember saying “goodbye” to Senai Airport, adding, “We’ll never see each other again.”
Unfortunately, I did see Senai again.
I took an AirAsia flight from JB back home to Sabah during the Christmas break. It was more than S$100 cheaper per trip compared with flying directly to or from Singapore. (RM284 [SG$115] vs ~S$250).
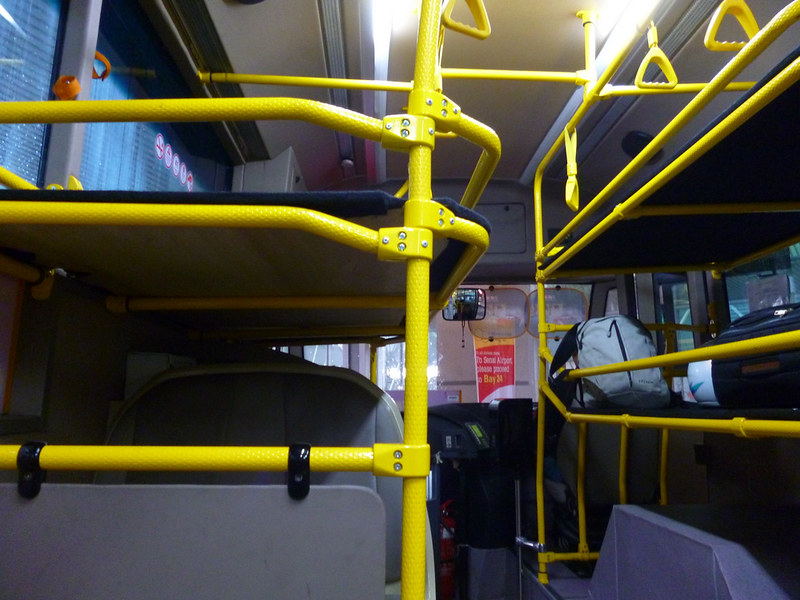
Compared to 4 years ago, AirAsia has made it convenient for passengers in Singapore to go to Senai. There’s a 2-hourly bus from JB’s CIQ to Senai. The bus journey is about 40 minutes and a pleasant ride.
AirAsia Sky Shuttle
When I was on the way to the airport, I asked the driver about the number of passengers who have taken the shuttle. He counted in his head and said, “13. And that’s a good number. It’s the weekend, you see.”
On the way to the airport, there were 3 passengers. On my way back to JB, there was only me. I have a feeling AirAsia might cancel the shuttle any time.
Since I had the chance to experience flying to Senai and to Changi, I will list down the pros and cons for you to decide.
Pros and cons of Senai and Changi
Cruel fate
Senai Airport
Pros:
Tickets are cheaper than flying directly into Singapore
Marry Brown fast food at airport
Less crowded at airport
Free transport to Senai and CIQ
Cons:
Extra travelling time to JB or Singapore (depending on traffic)
If you are still undecided, here are some factors to take into consideration when buying your JB/Singapore ticket:
Total price difference (Remember to count in transport fees from Senai into Singapore. It doesn’t make sense if your transport fees are similar to airtickets savings.)
Time to travel to airport (You will probably be travelling for an extra 2+ hours depending on your SIngapore location.)
Wait for SkyShuttle bus (Buses come 2-hourly)
Getting to location in Singapore (Do you have too much luggage? Do you really want to drag them from Malaysia to Singapore?)
Have you flown from JB airport instead of Singapore? How was your experience?
AirAsia revamped its Web site in November, changing all of booking pages. This is a refreshed version of the original “How to beat AirAsia’s b***s**t extra charges” with new screencaps and new step-by-step instructions.
Update: Feb 23, 2014. I’ve shifted some of the steps because AirAsia changed their sequence.
Update: Jan 13, 2013. Changing publishing date so the post will be higher up, ready for this round of Free Seats.
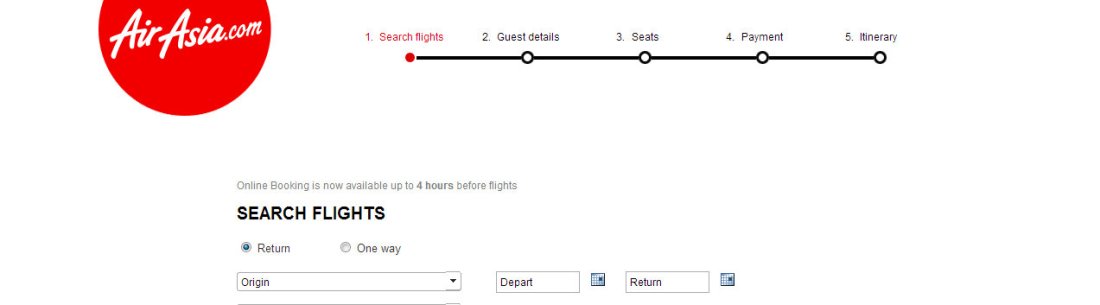
AirAsia booking first page
AirAsia has revamped its whole Web site. Good news is, some of the sneaky charges in the previous booking procedure have been taken out.
However, there might be still some confusion with the booking, I’m doing up a new version of the guide too.
For this money saving activity, you will need
Internet connection
Browser
Direct debit e-payment method (save RM4 per journey)
I am using a return flight from Singapore to Kota Kinabalu as an example. Please ignore the exorbitant flight price.
Step 1: Pick a good price
Unless you are flying within the month, I recommend that you wait for a while for the promos to roll in. The AirAsia Facebook puts up updates about the sales frequently. I haven’t figured out the promo fares’ cycles but they come quite quick.
Plan as far in advance if you can and do not buy tickets at full price. If you are booking during the promo period, remember that a lot of people are doing the same so you need to strategize your booking.
Step 2: Beat the charges I–Luggage
When you have selected the flight with the best price and time combo, you are ready to eliminate those sneaky fees.
At the page where you fill in the passengers’ details, you will come across the first extra charge–baggage fee.
AirAsia lists the 20kg as default. You can select 0kg if you are hardcore.
Get rid of AirAsia Baggage Fee
I’ve been travelling with only a carry one for many of my trips now. It takes some getting used to but it is possible to stuff a laptop, two dresses and other things into one backpack.
Be careful, you will need to deselect luggage twice on the same page if you have booked a return trip.
Money saved with 0kg: S$17 one way (for default 20kg price). Total saved: S$34
Step 3: Beat the charges II–Insurance
With the revamp, AirAsia has made it much easier to skip buying insurance. But it’s still a bit sneaky.
To remove insurance,
untick the box
click [Cancel]
click [OK]
Cancel AirAsia Insurance
A word of caution: I do not recommend having no insurance when travelling. I have an annual travel insurance by another company so I do not buy from AirAsia.
Money saved no insurance S$12.
Total saved: S$46
Step 3: Beat the charges III–Seat allocation
Hurray! There is no sneaky extra charge here.
Just head straight to Confirm on the lower right.
AirAsia seat selection
I was given the “Hot Seat” once (for free) but I didn’t feel that it was any better than the rest of the seats. Maybe the red faux leather was prettier than the boring black, but everything’s the same.
Unless you and your darling are two lovebirds who cannot bear to be apart (nice ad by the way, AirAsia) or you need to take care of your child/elderly, please be sensible and do not add any seats.
No sneaky charges. Hurray!. Total saved: S$34
Step 5: Beat the charges IV–Processing fee
We are almost there!
The last fees that you will encounter is very much like the Boss level in video games. You will need that “Direct debit e-payment method” I prescribed up there.
If you pay using a credit or debit card, AirAsia will charge you something they call a “processing fee” for each flight that you take.
It doesn’t mean that you can buy 10 person’s tickets in one transaction to even out the processing fee. It means it’s 10 x [processing fee]=A lot of wasted money.
[Update Sep 16, 2013] Since a month ago or so, AirAsia has started charging processing fee for direct debit payments as well. However, you will still save a measly RM4 if you use direct debit.
In Singapore, we can use ENets as the direct debit payment option, which eliminates the processing fee. Just change the currency to Singapore Dollar to get the ENets function.
AirAsia Direct Debit
For other countries, there are other ways so please research before you start your payment.
If you are buying tickets departing from countries without your Direct Debit option, change the currency to the one your account is based to see if they have the option for you.
Money saved with no processing fee S$16 return trip. Total saved: S$62
Step 6: S$62 richer (+pre flying tip)
So by being careful, I just saved myself S$62 for a single person return trip–enough to fund for another trip to a closer location! The amount also adds up if there are more travellers.
Also, remember to use Web check-in because they might charge you extra at the counter.
My tips are targeted at AirAsia. At my favorite money saving site: UK-based MoneySavingExpert, there’s extra tips on how to save money on budget flights with a focus on inter-Europe cheap flights.
That is all I have to impart. Go on your money saving journey, my friends!
For those who are not well versed in internet speak, here is a definition of “selfie” from urbandictionary.com:
A picture taken of yourself that is planned to be uploaded to Facebook, Myspace or any other sort of social networking website.
You can usually see the person’s arm holding out the camera in which case you can clearly tell that this person does not have any friends to take pictures of them…
I like taking photos when travelling but I do not have a lot of photos of myself.
In fact, I checked my Hoi An albums and found that out of the 440 photos I took, I was in 5 of them.
The reason I do not have as much photos of myself when travelling solo is that I am easily embarrassed and I do not ask strangers to take photos of me.
While I’ve not taken many photos of myself, I’ve devised a few ways to take a selfie when travelling:
1. Arm stretching
Basic level of taking a selfie is holding your camera at arm’s length. Make sure that not too much double chin appears.
2. Mirror mirror
Another basic level of taking a selfie is taking a photo of your reflection. This works best in museums with reflective surfaces or glass doors.
It’s best to crop the photo before you share it on the Internet or print it out:
The key to a good reflection selfie is to look at the camera lens or you will look distracted.
Take care to take photos of a smooth reflective surface, or you will end up looking like something else.
3. Balance it on things
An intermediate level way of taking a selfie is settling your camera on a surface and pose from a distance. This way, there is less chance of your double chin being exposed as it does in Tip 1.
Taking a photo this way requires an empty area, with no one to gawk at the poor tourist smiling at a camera on a timer or to steal your camera.
First set your camera’s timer (10 seconds is more than enough). Find a flat area to balance your camera. Look into the view finder/screen to guess where you should stand. Press the button to get the timer running. Run to the place to take a photo.
4. Hang it on things
Another intermediate level selfie. While I do not recommend hanging a DSLR from a skinny twig, it is possible to hang light snap and shoot on its strap and set the timer.
While waiting for the shot to take, pray hard that the camera doesn’t turn to the other direction or it will take a photo of the opposite direction.
5. Take photo of shadow
This is the most boring of selfies. A photo of your shadow isn’t the most exciting but at least there is a part of you in the picture.
It works best if you have a unique headshape or weird shaped clothes.
Do you have any selfie-taking tips for solo travellers?
To Padang Besar & Hatyai
When I was planning my trip to Padang Besar, Perlis, I wanted to walk from Malaysia to Thailand so I could tell people, “Yup, I’ve walked to Thailand from Malaysia before.”
So I flipped through the traveller’s bible, aka Lonely Planet, and was shocked.
In the tiny two-inch column for Padang Besar, the guidebook said: “Very few people, if any, walk the more than 2km of no-man’s land between the Thai and Malaysian sides of the border.”
NO INSTRUCTION, IT’S THE DAY OF DESTRUCTION.
After freaking out, I decided to become one of the “very few people” to walk to Thailand and back. And write a post about it. (Although another reason I’m walking is that I am too stingy to pay for the RM40 cab fare.)
A guide to walking from Malaysia to Thailand
Step 1 Get to Padang Besar’s immigration checkpoint Malaysian side of immigration checkpoint border
The entrance of immigration checkpoint is right in front of the big roundabout. Walk up to the toll booth-like area, keeping to your left since cars and motorbikes are on the right.
Step 2 Get your documents verified (and stamped)
Pass through the immigration checkpoint using the electronic gates if you have a Malaysian passport.
If you have a foreign passport, you’ll need to get it stamped at one of the officer’s booth.
Step 3 Walk a lot
It’s quite a long walk to the end of the border from the document checking area. Even though you will see a path (which is persumably for pedestrians) near the walls, do not take that route as it brings you to a dead end. Weird murals
Admire the murals while you walk. I am not sure who the murals were put up for, perhaps it is for drivers who are stuck in a traffic jam.
Wave as drivers drive pass and motorcyclists give you a second look. Sticking out a thumb to hitchhike here does not work. I tried.
You will eventually reach the end of Malaysia’s border where a few officials hang around.
Step 4 Explain why you are walking to anyone who asks
The immigration officers will be curious why you are walking when there are motorcycle shuttles. The excuse “Because we want to” does not seem to satisfy their curiosity.
The officer practically interrogated us after looking at our passports. When we said we just wanted to walk to Thailand, he told that there were motorcycles shuttling people across. I asked where the motorbikes are, he pointed to the other end. I told him that I will not walk all the way back just for a motorcycle.
After being released, we walked to the Thai part of the border.
Step 5 Reach Thai border
There are no lines on the road to tell where passengers can walk, so be careful of traffic.
Follow the cars and where a bunch of people are filling up forms. Fill up the form and pay RM1 to the immigration officer.
Step 6 Enter Thailand
With the new stamp in your passport, head out of the immigration checkpoint. Do not be alarmed that it looks exactly like Malaysia but with Thai signs.
A guide to walking back to Malaysia from Thailand
Step 1 Get to Padang Beser checkpoint
The line back to Malaysia is not the same as the one you came in from. It’s at the other gate.
Step 2 Get passport stamped
Get your Checking Out stamp and hand over another RM1 to the person behind the booth.
Step 3 Walk back to Malaysia
The Malaysian folks will be less curious about you by now. Walk on. Same as usual, walk on the left side of the road to avoid traffic.
There is a sad duty free store along the no-man’s land. The Zone duty free shopping
Step 4 Get your documents verified to enter Malaysia For pedestrian
Show off your passport to the official at the toll booth. You must get an entry stamp or face being stripped naked during interrogation when you want to leave Malaysia. This is serious business.
Step 5 Get your luggage scanned
There’s probably no one in luggage check so just ignore this step.
Step 6 Back in Malaysia
At the end of the Malaysian customs, another officer will be interested in why you are walking. Answer his questions even though you know all the answers are in the passport which he is holding. Smile pleasantly.
Have you walked through the Malaysian-Thai border before?
It’s that time of the year when AirAsia has its “Free Seats” sale. This time, the sale will be held on the coming Monday, Oct 29 at 0:00 GMT +8.
Unfortunately, I probably won’t be able to book those Free Seats because I am still travelling at the start of the sale.
However, I’ve whipped up a few tips so you can successfully book those Free Seats* (airport tax and service charge not included).
Before you go around saying, “Hey, why do I still need to pay if it’s a Free Seats sale?”, remember, the plane ride itself costs nothing but you pay the usual airport tax, service charge. You can beat secret extra charges too if you know where to find them.
These RM0 sales was once a really rare event. But AirAsia had two of these Free Seats sales just this May and September. It’s great that it’s getting more frequent. This also means that if you cannot book your flights in this round, the other round will come soon.
Are you ready to book those Free Seats? Let’s go! (PS The following tips are adapted from a guide by AirAsia. Even if you have read the guide, I have a few tips based on my booking experience so please read on.)
Preparation before sale day
You should prepare for the sale by following the list below a few days before the sale. Doing it on the day of booking will cost you time and even make you lose your Free Seat.
Step 1: Sign up for an account
Even if you will only book from AirAsia once, sign up for an account as this will cut down the time you make bookings later.
You will be able to save your travel information (such as passport number, passport expiry date, phone number etc) to the account as well. You will need these information when you make the booking.
Step 2: Register your Family and Friends list
Once you have an account, register your travelmates’ names and travel information in the Family and Friends list.
This list saves the travel information of your Family and Friends so you can add them into your booking with only a few clicks. (Similar to Step 1, you will need the personal information of those travelling with you.)
Tip: If you or your travelmate’s passport is expiring around the dates you want to book, just give a pretend expiry date. You can change the passport number and date later after you’ve made the booking.
Step 3: Figure out the routes and dates you want to fly
There are only a few “Free” tickets for each flight so if those RM0 tickets are snatched up, you will get slightly more expensive tickets. This is why you need to be quick and plan really far ahead.
As the tickets are usually for dates that around half a year earlier, you have to figure out which are the best dates to travel. This includes finding out if there are long weekends or public holidays which you can take advantage of.
Also, it’s not worth going on trips where you reach too late or leave too early because you will waste half day’s leave (or your precious holiday time) going to the airport or flying back.
Step 4: Have two or three backups
Even if you are clever enough to plan your trip around public holidays, other buyers are thinking the same. That’s why it’s important to have a few backup destinations or dates.
Without backups, changing dates while booking might be easy if you are a solo traveler. But if you are travelling in a group, make sure everyone is fine with the backup dates.
Step 5: Familiarize yourself with AsiaAsia’s booking system
Practice makes perfect so go ahead and pretend to book a few tickets until you’ve reached the page where you actually need to pay money.
This way, you will also see where the tricky extra charges are laid out. My post on how to beat AirAsia’s b***s*** charges tells you how to avoid those fees.
Tip 1: Book early or at a weird timing
I don’t think I’ve been lucky enough to book a Free Seat in the first hour of launch because the servers are usually too busy.
But I’ve had success booking at strange timings like early in the morning, in the office (don’t tell my boss. Shh…) or some days after the initial craze.
For the last few sales, AirAsia has implemented a “Waiting Room” system where you wait for the servers to be less busy before you are brought to the booking page. Make sure you have enough time to wait for your turn when making the booking.
Tip 2: Book through mobile site
There was a year when I booked my free seat through the mobile site and managed to snag one or two free seats. Unfortunately, I could only pay by credit card so there was the extra credit card processing fee.
Tip 3: Be patient!
This tip is actually targeted at myself. I run out of patience when trying to book and that doesn’t really help with the booking experience.
Do you have any tips to share?
That is all I have for now. I’ll update this page if I think of any new tips. If you are a AirAsia veteran, please share your tips for booking Free Seats.
As I was writing this money saving guide for Tokyo, I realized that there is just too many sub-categories so I split the tips into three different posts.
This post is about saving on transportation. There is another on food and drinks as well as accommodation and sightseeing.
Transportation in Tokyo is crazy. A short trip would cost 180 yen (US$2.3) on the train which is very expensive compared to Singapore.
From Narita Airport: Get the Suica & N’EX package
Suica & N’EX package
I picked up the Suica & N’EX package for 3,500 yen when I reached Narita airport. It includes transport into the city (and slightly beyond) as well as a 2,000 yen Suica.
The package also good value because the N’EX limited express train to Tokyo is 2,940 yen (gasp!).
From Haneda Airport: Get Monorail and Yamanote Line Discount Ticket
Monorail and Yamanote Line Discount Ticket
Only available on weekends
If you arrive at Haneda Airport during the weekend, remember to pick up this discounted ticket.
For just 500 yen, you can take the monorail and leave at any stations on the Yamanote Line. If you are exiting at other JR stations, just pay the extra at the counter.
Free one-way day trip with Suica & N’EX package
If you have a day trip planned to either Yokohama or Kamakura, I recommend doing it on the day you arrive if you reach before noon.
I was planning to visit Yokohama but when I found out that the package covers Kamakura, I changed my plans immediately.
A trip from Tokyo Station to Kamakura would cost 890 yen. So in theory, I’ve saved a little by heading straight there instead of taking the day trip on another day.
Transfer rebate with Suica
If you are using Suica to pay for your transport, it automatically gives you rebates when you transfer from trains of the same company.
Stick to the same company on trains
Tokyo Metro
Planning your transport within Tokyo is really tricky. There are just too many lines and too many different train companies.
Many times, I had to transfer from one train line to another to reach my destination. I accidentally took different train lines for a ride and it cost me more than it would if I had transferred from the trains of the same company.
So, I suggest taking trains from the same company when you travel. This might mean an extra 5 minutes, but it’ll cost 200 yen less.
For transportation, travellers to Singapore can choose between a day pass, the EZ-Link (stored value card used by locals for transport and other small payments) or paying by cash.
Singapore’s day pass is called the Singapore Tourist Pass (which I will shorten to STPass).
Singapore Tourist Pass
When I first read about STPass, my gut feel told me the pass is not worth the money and that a regular EZLink is an even better value for a traveler.
Here is the cost of the pass:
1 Day Pass S$10
2 Day Pass S$16
3 Day Pass S$20
The official site also lists a comparison between the STPass and EZ-Link.
However, I’m not quite sure what this line means: “Hence passes issued in Singapore come with a rental deposit of S$10 which is fully refundable if the card is returned within 5 days from the date of issuance.”
Update: You’ll need to give an extra S$10 when you buy the card. You’ll forfeit the money if you decide to keep the card. (Too expensive!)
The math
To see if my gut feel is right, I’ll do the math of travelling on an EZ-Link card for 3 days. EZ-Link Card
For accomodation, let’s pretend that we’re staying at Raffles Hotel which I cannot afford (but bear with me).
Day 1:
Raffles Hotel to Singapore Zoo $1.89
Singapore Zoo to Orchard MRT station $1.72
Orchard Road to Clarke Quay MRT $0.83
Clarke Quay back to Raffles Hotel $0.88 Total spent: $5.32 + (non-refundable $5)=$10.32
Day 2:
Raffles Hotel to Chinatown $0.88
Chinatown to Little India $0.88
Farrer Park to Raffles Hotel $0.83 Total spent: $2.59 Day 1 + Day 2 expenses= $7.91
+ (non-refundable $5) =$12.91
Day 3
Raffles Hotel to HarbourFront $1.26
Monorail from HarbourFront into Sentosa $3.00 [Micheal said the pass does not cover this charge.]
Sentosa back to HarbourFront (Free)
HarbourFront to Raffles Hotel $0.83 Total spent: $5.09 + $3 Monorail Day 1 + Day 2 + Day 3 expenses= $16
+ (non-refundable $5) =$21
There’s a small flaw with my calculations though: Most of my transport cost involves taking the bus. I like taking buses but some travelers might shun buses because there are too many routes.
Verdict
[Update (12/6/2012):] If we add the $3 for Sentosa Monorail, it gets a little more expensive. Turns out, the STPass is quite a good value for travellers. This is due to the unrefundable $5 in the EZ-Link card. But you have to make sure that you will take enough public transport to cover your STPass.
I have to admit that the STPass does look a lot prettier than a regular EZ-Link. So if you are travelling to Singapore, maybe you can give it a try.
UPDATE: As Gurpal mentioned below, the card is only available at selected MRTs and at specific timings. Boo.
Have you bought the Singapore Tourist Pass before? How was your experience?
Singapore, the Lion City, is the smallest country in Southeast Asia but it is also the wealthiest. The country has a reputation of being clean, safe and strict in enforcing its laws.
For many travellers from the west, Singapore may only be the stepping stone to other countries in the region or to Australia. If you do end up in Singapore for only a day, here is a sample itinerary. I would recommend giving the city at least two days so there will be a second “24 hours in Singapore” coming up.
Day 1 9 a.m. 1. Explore Bugis area for food and temples
Take the MRT (Mass Rapid Transit) to Bugis Station and head to the Bencoolen hawker centre on Albert Street. Choose between the Chinese, Malay or Indian stalls for breakfast.
For coffee lovers, skip the Starbucks and get a Kopi which is served with sweet condensed milk.
After food, head to the Goddess of Mercy temple, or Kwan Im Thong Hood Choo Temple on Google Map [178 Waterloo Street]. You won’t miss it because of the scent of incense. Outside the temple, there are flower sellers and fortune tellers who will read your palm or your face and tell you if you will have a good life or a bad one.
Temple of the Goddess of Mercy
A couple of doors away is the bright and colorful Sri Krishnan Temple which is over 130 years old. You can visit the temple after taking off your shoes. The statues of gods and goddesses inside the temple are worth looking.
Opposite the temples are stores selling dried food. When you approach the stores, you will smell a unique scent of dried mushrooms and Chinese herbal medicine.
After the temples of Bugis, turn back into the shaded Bugis Street. Inside, there are many souvenir shops and drink stalls. If you are adventurous, at the other end of Bugis Street, right next to the bus stop, is a Chinese food stall selling marinated spicy duck neck and duck feet.
12 noon 2. Arab Street
It is time to head to walk to Arab Street for more sightseeing and also lunch.
On Arab Street, you can visit the Sultan Mosque[3 Muscat Street] which is said to be the most beautiful mosque in Singapore. Tourists can go into the mosque at specific hours.
Sultan Mosque
For food, you can visit the various restaurants on Haji Lane for Arabic food. For Indian food, I recommend Zam Zam Restaurant [697 N Bridge Rd] which also has another branch at the other end of the shophouse lot.
Zam Zam Restaurant
After lunch, you can wander around the area for trinkets and even Sari cloth.
3 pm 3. Chinatown
From Arab Street, the easiest way to Chinatown is by bus. If not, you can take the MRT to Outram Park and change to the purple line and to Chinatown.
I’ve heard many tourists say that Singapore’s Chinatown is the cleanest Chinatown that they’ve visited. Still, the area is a bit stuff so try to be there when the sun is not too high up.
Chinatown
Recommended sights: Chinatown Heritage Centre [48 Pagoda Street]
In this three-storeyed shophouse is a recreation of a typical Chinese quarters in Singapore’s early days. The early Chinese immigrants lived in tiny rooms during the night while they did labor work in the morning.
Sri Mariamman Temple [242 South Bridge Road]
If you did not visit Sri Krishnan Temple in Bugis, there’s another Indian temple in Chinatown. This temple is even bigger with even more painted statues.
Sri Mariamman Temple
Buddha Tooth Relic Temple & Museum [288 South Bridge Road]
This Buddhist temple houses the tooth of Buddha. I find the exterior of the temple too “modern”–the walls too white, the paint too fresh and the lines too straight.
There is plenty to eat in Chinatown. Opposite the Buddha Tooth Relic Temple is Maxwell Food Court where famous chicken rice stalls are located. I prefer the food court next to People’s Park Complex although it can get really hot in the day.
7 pm 4. Clark Quay
After dinner, walk along Eu Tong Sen Street to Clarke Quay MRT station. This area comes alive at night, although I must warn that the restaurants and bars are targeted at tourists.
If you feel like it, take a boat ride on the Singapore River. I would not recommend this as it is too touristy.
Then take a stroll to the mouth of the Singapore river. You will walk through many underpass and past many bars and restaurants. Use the brightly lit Fullerton Hotel as your guide, walk towards it. On the left of the bank is the Asian Civilization Museum which has a good collection of Asian artefacts (but is closed at night).
After you pass The Fullerton Hotel, cross the road to the Merlion Park. Here, you will find two Merlions–half lion, half fish beings made up by the Singapore Tourism Board.
Opposite, the strangely shaped Marina Bay Sands sparkles. At night, it has lazer shows with light beamed to the sky.
View of MBS from Merlion Parl
Our last stop is the Esplanade, which is the shiny durian (prickly local fruit) building. It’s like the Sydney Opera House, but pricklier.
10 pm 5. Mustafa Center
After the Esplanade, you can choose between going to more pubs, heading back to your hotel and rest or visit Mustafa Center. The nearest MRT station is Farrer Park.
The shopping center is 24-hours and has almost everything you need. If you want to get Indian spices, gold chains, a watch, T-shorts, souvenirs, this is the place.
After all that shopping, maybe it’s time to head back to sleep so you won’t miss your plane.
IF YOU GO
ACCOMODATION
Rooms in Singapore will not be as cheap as the rest of Southeast Asia. As transportation in the city is convenient, it does not matter much where you are staying.
If you only have a short time in Singapore, the best locations will be near the sights: Little India, Chinatown, Bugis, Clark Quay etc.
This list is only a reference:
Five Stones Hostel http://www.fivestoneshostel.com/
Near: Clark Quay
[Disclaimer: One of the owners of the hostel is a friend of my colleague.]
From photos, this looks like a funky place to stay. All dorms and rooms have shared bathrooms.
MONEY CHANGER
Most money changers in Singapore are honest and give rates that are similar (even at the airport), although those inside shopping malls have more expensive rates.
While these are the more famous money changers, it’s not worth the transport fee to reach them just so you could save a few cents. “Best” (everywhere is quite good) places to change money are Chinatown and Mustafa Center.
STAY CONNECTED
Prepaid 3G in Singapore is not as cheap as Malaysia. There are only three mobile operators here: SingTel, StarHub and M1.
Personally, I use StarHub’s prepaid because it gives me 50 (yes, five-zero) free international SMS for the day when I send 5 international SMS in a day.
StarHub has a special Preferred Tourist Prepaid SIM Card with free 300MB data and has S$18 credits for S$15.
I’ll be doing a part 2 of 24 hours in Singapore. Have I missed out any must see sights? Tweet me or leave a comment below.
A bit about Flocations, it’s a Web service that lets you pick Southeast Asian budget flights based on your budget and dates. Same end goal as Flight Lover (Cheap flights within my budget but different way of doing it.
PS I’ve just started my guest posting journey, which Alexis Grant from the currently-called The Travelling Writer recommends doing right at the start.
If you are looking for travel/lifestyle posts on Singapore, Malaysia or the Southeast Asian region, drop me a mail yqtravelling[at]gmail.com.
Extra: How to renew your Malaysian passport online
1. Sign into MyOnline Passport using Chrome.
2. Fill in correct information and upload a photo of the right format.
3. Pay using credit card.
4. Save the receipt onto your computer.
5. The passport should be ready at where you said you will pickup in 2 hours time.
How many travellers does it take to renew a passport?
The answer is one. But when the traveller is well-known for being a scatter-brain procrastinator, it might take a lot more than that.
My passport with the number H180XXXXX was expiring on Jan 30, 2013. But we need at least 6 months of validity for our passports if we want to travel overseas.
I’m working in Singapore with a Malaysian passport, I don’t think having an “expired” passport will sit well with the authorities.
While I was determined to get a new passport when I head home during the end of June, I only successfully retrieved the new passport on July 28, in Johor Bahru which is 8,000++km away from home.
Here’s the story of how I finally renewed my passport.
Pre-June 29. Location: Singapore
(Countdown to expiry 30+ days + 6 months) At the office
More than month till my passport expires. No worries.
I keep announcing to my colleagues that I will renew my passport when I am back home at the end of the month for my classmate’s wedding.
I even make sure to place my passport in my handbag (which is really redundant because I need it to travel home anyway.)
June 30. Location: Kota Kinabalu
(Countdown to expiry 30 days + 6 months) Home sweet home. No, that's not my house
I am supposed to renew my passport today. I have even planned out the day’s schedule: renew passport in morning, go to mall nearby while waiting for the passport to be churned out in two hours, collect passport.
But it didn’t happen. Why? Because I’ve forgotten to bring my Identification Card (IC) back home.
It did cross my mind that I should bring my IC back. But being me, I didn’t heed that small warning.
My parents grumbled. I told them to relax.
Instead of a new passport, I had passport photos taken.
July 2. Location: Singapore
(Countdown to expiry 27 days + 6 months)
Back in Singapore, maybe I can renew my passport at the High Commission of Malaysia here.
Oh no, Sabah/Sarawak passports need two extra months of processing since they need to send it back. This is ridiculous.
July 11-15. Location: Hoi An, Vietnam
(Countdown to expiry 15 days + 6 months)
Well, since I’m overseas having fun. It’s not possible to renew my passport.
Let’s not worry and eat this bowl of pho. Nom nom nom.
July 19. Location: Singapore
(Countdown to expiry 10 days + 6 months)
Only 10 days weeks till I’m considered an illegal alien. Gaa! Let me drink this cup of tea to calm my nerves.
Boss asks when my passport is expiring, gives hint of an upcoming trip.
I call up the Johor immigration office to ask if Sabah passports take a longer time to process. It doesn’t. (Phew.)
But the immigration office will be closed during the 21st and 22nd weekend because of the beginning of the fasting month.
Panic starts to creep in.
July 23. Location: Singapore
(Countdown to expiry 7 days + 6 months)
OK, do not panic. D suggests I sleepover in Johor and run to the immigration office as soon as the door opens.
Sounds like a plan.
July 24. Location: Singapore
(Countdown to expiry 6 days + 6 months)
I decide I should get the online passport renewal system, MyOnline Passport, a try.
I use Firefox which has always been more stable for important sites. After filling in all my details, I find out that I cannot upload my photo.
Panic.
I decide to use Chrome. Oh! Photo upload works. Let me fill in my credit card details, select Johor as my pickup point, and sent everything over. A Web page gives me the receipt for the transaction and says I can pick up my passport after 2 hours.
July 25, 26, 27. Location: Singapore
(Countdown to expiry 5, 4, 3 days + 6 months)
I keep worrying that MyOnline Passport doesn’t really work, while reassuring my boss my passport will be collected on Saturday.
July 28. Location: Johor Bahru
(Countdown to expiry 2 days + 6 months)
Today’s the day of passport collecting, if I don’t get it done, I will be stranded in Johor until I get it sorted out.
I wake up at 7am, take the bus to Woodlands, switched to a bus to the checkpoint. A cab drives slowly pass the lobby after the checkpoint, I jump in.
After a RM16 cab ride, I am at the Johor Bahru immigration center at 9.40a.m. I don’t know which of the four buildings houses the passport office. I sprint from the car park to the center of the buildings–if my online passport application hasn’t been successful, I will need to get the paperwork done before 10am as the office closes at noon on weekends.
The employees at the carpark stopped me.
-Where are you going?
-To get my passport renewed.
-Oh! I thought you dropped your passport or something. Take that lift to the third floor.
-Thank you!
I reach the office. The queue is crazy. I am going crazy. I ask the lady for a queue number. She sees that I am collecting my passport so send me to counter 11.
OK, not as many people here. I hand over my passport pickup slip, telling the person I renewed it online. He tells me to take a seat and they will call out my name.
I stand in the corner and send an SMS to mom to tell her that I am waiting to collect my passport. I see a man with a stack of passport coming from behind the office.
My name is called. I take a seat, sign my passport and give them my right thumbprint.
I’m in the office for less than 10 minutes and my brand spanking new passport is in my hands.